
How should I install my Hardwood flooring?

Hardwood installation can be a DIY…. If you are up for a challenge!
Typically, a solid hardwood is going to be 2 1/4” or 3 1/4” wide. This matters because during installation of these products a 2” 15 1/2 Gauge staple is used, leaving less room for movement. There are very limited selections of a solid hardwood any wider than those options, but when you have them installed 4” or wider it is suggested to do an S or a Z pattern of glue on the back. Our trained and professional installers like to add the glue with the staples for more security and stability over time as it allows for less air movement, popping, squeaking and cracking. We refer to this as a sausage tube glue and you will see why below. We use a different brand than what is shown, but these can generally be ordered at your local box stores, hardware stores, or flooring retailers. If you are local to us, feel free to stop in and we can grab some for you if you need it for install!

Engineered Hardwood has not only wider widths, but also different thicknesses, so you have to figure your specifications before planning for its installation.

Most engineered hardwood advertises that it can be stapled, glued, or floated. When deciding your installation method you want to consider how long you want it to last, the traffic in your home, and the install areas.
Over the years, the wider planks have gained popularity, so to keep the stability in hardwood, and prevent wider gaps during expansion and contraction, many flooring manufactures turned to engineered wood on planks 4” and wider. If you would like to learn more on why you can check out our “Engineered VS Solid Hardwood” blog. With these planks you will find the construction to be anywhere from 3/8” thick to 3/4” thick. Once you know the thickness you are dealing with, then you can determine the length of the staple needed for installation if you are following the staple method.
If you intend to staple your engineered hardwood, we would suggest installation being like that of solid hardwood with the staple and the glue assist. Again, the length of your staple will be determined by the thickness of your flooring! Most flooring will come with a specification sheet that will give recommendations on installation methods. Keep in mind, usually these recommendations are for those who do not install flooring everyday, so if you hire a professional, and they follow a method that is not listed on the spec sheet… it is likely because they have found a better way to install that certain spec.
Although the engineered hardwood has a ply system that makes it less likely to expand and contract, it still is a real wood veneer so it still will have SOME of that expansion and contraction. Since we carry and installation warranty on any job we perform, we like to do a full spread glue down method, and don’t even use staples. Many of the planks that our clients prefer are 7”-10” wide. Our installers don’t want to leave any room for popping, squeaking, or cracking. Those sounds are typically from air bubbles moving underneath your hardwood planks, so by having a full spread glue your flooring is adhered directly to the subfloor where there is no room for air to get under your planks whatsoever. If you have installed with a full spread adhesive and can still hear those popping, squeaking, or cracking sounds, it is likely the subfloor that needs to be secured to a joist.
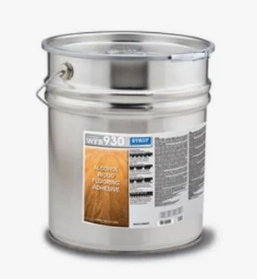
There are many hardwood glues that you can choose from. Our installers move efficiently, and typically have crews of 2-4 people, so we prefer a certain glue that cures quickly that can allow for walking within 24 hours. The glue we choose to stock in our storefront and find the best performance out of is an alcohol based glue that as it dries, the alcohol evaporates and the glue dries as a rubbery substance and acts as the moisture barrier underneath the engineered flooring.
Floating your engineered wood
This is a method that is not used often, but is what a lot of DIYers choose to do as it does not require many special tools other than a table saw and tape measurer.
If you intend to float your engineered wood, just keep in mind that higher traffic areas are more likely to separate as there is nothing securing the planks together. You may also notice that the planks slightly move, as they are only a tongue and groove so can easily scoot if not installed properly next to the walls and base. Since this method has no security to your actual subfloor, you may feel it bounce, or have several pops, squeaks, and cracks. This method can be followed if it is more temporary, and you may even be able to reuse the wood if you pull up to reinstall in the same area or a different area.